As your local Surrey Surveyor, we go beyond what the eye can see. Thermal imaging cameras are one of the most powerful tools in a modern building surveyor's kit — and in this guide, we explain exactly how we use them to find the hidden defects that could cost you thousands.
What Is Thermal Imaging and How Does It Work?
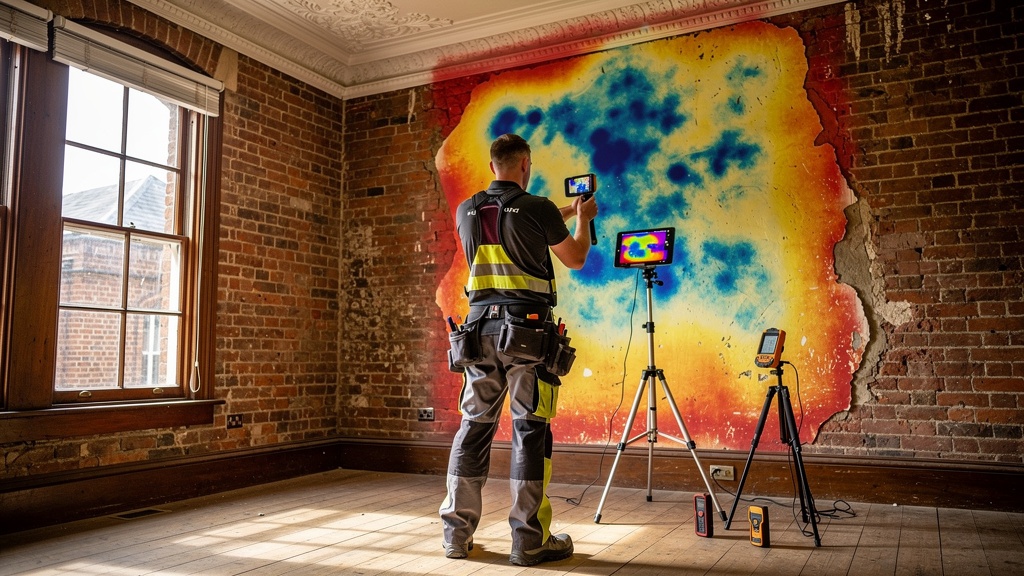
Thermal imaging, or infrared thermography, is the process of using a specialised camera to detect differences in surface temperature. Every material — brick, plaster, timber, insulation — radiates heat at a slightly different rate. A thermal imaging camera captures these differences as a colour-coded picture called a thermogram.
Areas that are warmer than expected appear in shades of yellow, orange and red. Areas that are cooler than expected appear in blues and purples. To an untrained eye, it just looks like a colourful picture. To a building surveyor, it tells a story.
Our surveyors at Surrey Surveyor are trained to interpret those colour patterns and cross-reference them with our physical inspection of the building. It is this combination — technology plus expertise — that makes thermal imaging so valuable.
What Can Thermal Imaging Detect in a Property Survey?
This is where it gets exciting. A thermal imaging survey can reveal a whole range of defects that are completely invisible to the naked eye — hidden behind plasterboard, above ceilings, inside walls and beneath floors. Here are the main things we look for:
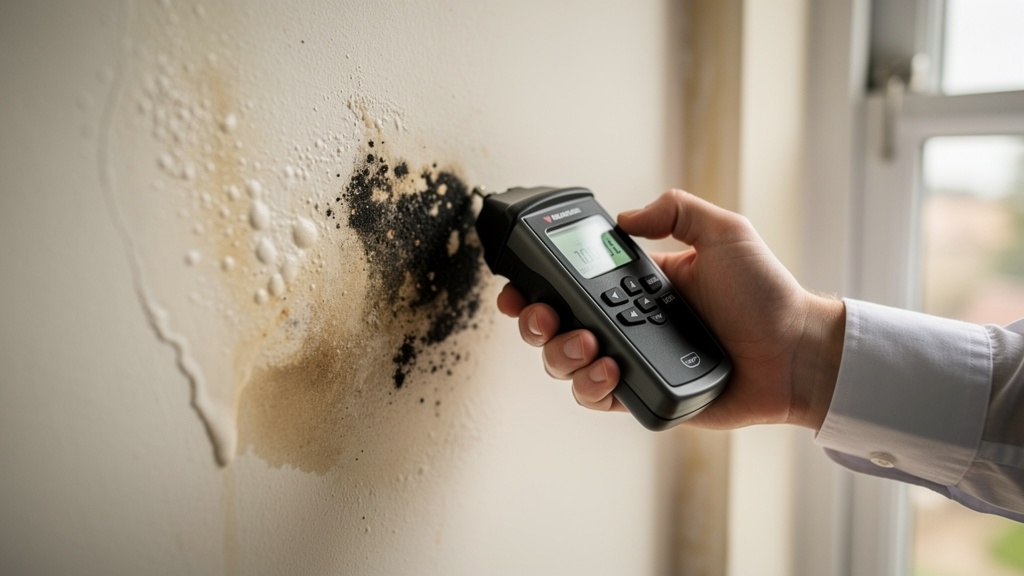
1. Damp and Moisture Intrusion
Water is one of the most destructive forces in a building. The trouble is, it doesn't always announce itself. Moisture trapped inside a wall cavity, behind plasterboard or beneath floor coverings can cause serious structural damage — timber rot, mould growth, corrosion of embedded metalwork — without a single visible sign on the surface.
Thermal imaging detects damp because wet materials retain heat differently to dry ones. A damp patch inside a wall will appear as a distinctive cool area on the thermogram, even when the wall surface looks perfectly normal.
We recently used thermal imaging in a four-bedroom detached home in Cobham, Surrey. The homeowners had noticed a faint musty smell in the dining room but could see no visible sign of damp anywhere. The thermal camera picked up a clear cool patch running horizontally across the base of one wall — pointing us straight to a blocked cavity tray that was allowing rainwater to bridge into the inner leaf. Without the thermal camera, we might have missed it entirely.
2. Heat Loss and Missing Insulation
Energy efficiency is a hot topic (pardon the pun), and for good reason — poorly insulated homes cost their owners significantly more to heat every year. Thermal imaging is an excellent way to identify where heat is escaping from a property.
Missing loft insulation shows up clearly as bright warm patches on the ceiling when the heating is on. Cold bridging — where a structural element like a steel beam or concrete frame bypasses the insulation layer — appears as a cold stripe along a wall or ceiling. Poorly fitted cavity wall insulation can be identified by uneven temperature patterns across external walls.
For buyers considering a home purchase, this kind of information is invaluable. Knowing that a property has patchy cavity wall insulation, for example, allows you to factor in the cost of remedy or use it as a negotiating tool.
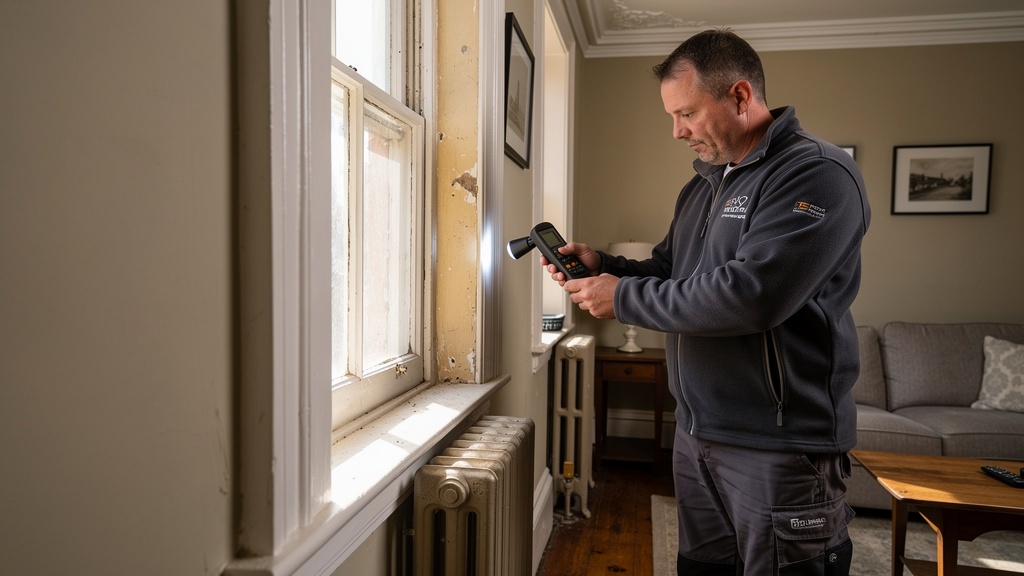
3. Electrical Hotspots
Overloaded circuits, loose connections and failing components in a consumer unit or distribution board generate excess heat. Thermal imaging can spot these electrical hotspots before they become a fire risk. While this is more commonly associated with commercial electrical inspections, it is a useful cross-check during a full building survey when we have access to the consumer unit.
4. Roof Defects
A leaking roof does not always produce an obvious wet patch on the ceiling immediately below. Water can travel along roof timbers and joists before dripping down, sometimes ending up far from the original point of entry. Thermal imaging allows us to scan large areas of ceiling quickly and identify temperature anomalies that suggest water ingress above.
Flat roofs in particular benefit from thermal imaging surveys. Water trapped beneath a flat roof covering creates a distinctive temperature signature that is very difficult to identify by any other non-destructive method.
5. Underfloor Heating Faults
Underfloor heating systems are increasingly common in Surrey homes, particularly in extensions and kitchen renovations. When a homeowner complains of cold spots in a floor with UFH, thermal imaging can scan the floor surface and map the heating circuits precisely — identifying breaks, airlocks or poorly laid sections without any need to lift the flooring.
6. Plumbing Leaks
Hidden plumbing leaks beneath floors or inside walls can cause extensive damage before they are discovered. The wet area around a slow leak retains a different temperature to the surrounding dry material, making it detectable by thermal imaging even when it is hidden from view.
Is Thermal Imaging Standard in All Building Surveys?
Not always — and this is worth understanding before you commission a survey. Thermal imaging equipment is expensive to purchase and maintain, and operating it properly requires specific training. Many surveying firms, particularly those offering low-cost surveys or relying on junior staff, do not include it as standard.
At Surrey Surveyor, we include thermal imaging as part of our Level 3 Building Survey where site conditions allow. For our Level 2 HomeBuyer Reports, we offer it as an optional add-on — something we would always recommend for older properties, those with suspected damp issues, or homes with flat roof sections.
The difference it can make to the completeness of a survey is significant. We have found defects using thermal imaging that would not have been visible through any other non-invasive method, saving our clients from nasty post-purchase surprises.
What Are the Limitations of Thermal Imaging?
Thermal imaging is a powerful tool, but it is not magic — and any surveyor who tells you otherwise is overselling it. There are real limitations that a trained professional needs to understand and communicate clearly.
Temperature Differential Requirements
Thermal imaging works best when there is a meaningful temperature difference between the inside and outside of a building. In practice, this means the heating should have been running for several hours before the survey, and the external temperature should ideally be at least 10°C cooler than inside.
In summer months, when external and internal temperatures are similar, the results of a thermal survey are far less reliable. This is why we always advise clients booking surveys for summer months to consider whether they want to add thermal imaging, or whether they would prefer to wait for a cooler period.
It Shows Temperature, Not Defects Directly
A thermal camera shows temperature variations. It does not directly show you damp, missing insulation or a leaking pipe. It takes a skilled and experienced surveyor to interpret those temperature patterns correctly and identify what is causing them.
A temperature anomaly behind a wall could be caused by damp, by a heating pipe, by a window reveal, or simply by a variation in wall construction. Our surveyors cross-reference thermal images with moisture meter readings, visual inspection and local knowledge to arrive at a confident diagnosis.
Some Materials Block Thermal Radiation
Shiny, reflective surfaces — certain metal claddings, mirrored glass, aluminium foil insulation — can reflect thermal radiation and produce misleading readings. Our surveyors are trained to recognise these artefacts and adjust their interpretation accordingly.
A Real-World Case Study: Uncovering Hidden Damp in a Reigate Cottage
One of our most memorable thermal imaging discoveries came during a survey of a 1920s semi-detached cottage in Reigate. The buyers — a young couple moving from London — had fallen in love with the property and were keen to proceed quickly.
During the survey, our director James Thornton used the thermal camera to scan the ground floor walls. Everything looked normal until he reached the rear reception room, where a faint but distinct cold pattern appeared along the base of the chimney breast — not at the hearth level, but much higher up, near the ceiling.
Further investigation — using a moisture meter and a borescope camera inserted through a small exploratory hole in the plaster — revealed that the chimney had been capped many years before, but the cap had failed. Water had been running down the inside of the flue and saturating the brickwork in the upper section of the chimney breast. From inside the room, the wall looked perfectly dry.
The repair cost was estimated at around £3,500 to re-flash the chimney, replace the cap and replaster the affected area. Without thermal imaging, that defect would almost certainly have been missed — with potentially much greater damage occurring over the following winters.
How Much Does a Thermal Imaging Survey Cost in Surrey?
The cost of adding thermal imaging to a building survey varies depending on the size and type of property. As a rough guide:
- Level 3 Building Survey with thermal imaging included: From £650 to £1,200+ for a standard Surrey home, depending on size and age
- Standalone thermal imaging survey: From £250 to £500 for a standard residential property
- Thermal imaging add-on to a Level 2 HomeBuyer Report: Typically £150–£250 additional
These figures are a guide only — contact us for a personalised quote based on your specific property.
When you consider that a single hidden defect can cost thousands to repair, the additional cost of thermal imaging is almost always excellent value for money.
Surrey Surveyor: Our Thermal Imaging Equipment
We use professional-grade FLIR thermal imaging cameras, which are among the most respected in the industry. Our equipment has a thermal sensitivity of better than 0.05°C, meaning we can detect extremely subtle temperature variations that a lower-specification camera would miss entirely.
All our surveyors who use thermal imaging have completed specialist training in infrared thermography for building inspections. We do not hand a camera to an untrained operative and hope for the best — we take our use of this technology seriously, and we communicate its findings clearly in our written reports.
How to Get the Most from a Thermal Imaging Survey
If you are commissioning a survey that includes thermal imaging, there are a few things you — or the vendor — can do to ensure the best possible results:
- Heat the property for at least 12 hours beforehand — ideally 24 hours for best results. The heating should remain on at normal levels until the surveyor arrives.
- Close all windows and external doors the evening before the survey to stabilise the internal temperature.
- Survey in cooler weather where possible — autumn and winter produce the best results. If your survey is in summer, discuss with your surveyor whether thermal imaging will be reliable.
- Ensure the surveyor has access to all areas — loft hatch, underfloor access hatches, garage, outbuildings. Thermal imaging is most useful when every area can be assessed.
Should You Request Thermal Imaging for Your Surrey Property Survey?
Our honest answer is: yes, almost always — especially for older properties. Surrey has a wonderful stock of Victorian, Edwardian and interwar housing, and these older buildings have many places where water, heat and moisture problems can hide. Thermal imaging gives you a level of certainty that a standard visual inspection simply cannot match.
If you are buying a 1990s new-build in a straightforward condition, the case for thermal imaging is less compelling — though it can still be useful for checking insulation installation quality. If you are buying anything pre-1980, or any property with a flat roof, chimney stacks, solid walls or a history of damp complaints, we would strongly recommend it.
Frequently Asked Questions: Thermal Imaging Surveys
Can thermal imaging see through walls?
Not literally — it cannot see through walls like an X-ray. It detects differences in surface temperature, which can indicate what is happening inside or behind a wall. A thermal camera reveals temperature patterns on the surface; a trained surveyor then interprets what those patterns mean.
Is thermal imaging the same as a damp survey?
No — they complement each other but are different tools. A dedicated damp survey uses moisture meters, hygrometers and sometimes invasive investigation (drilling, lifting covers) to assess damp. Thermal imaging can indicate where damp may be present, but it needs to be confirmed with additional moisture readings before a conclusion is reached.
Does every building surveyor offer thermal imaging?
No. It requires specialist equipment and training. Always check whether thermal imaging is included in your survey or available as an add-on. At Surrey Surveyor, we include it in our Level 3 Building Surveys and offer it as an option with Level 2 HomeBuyer Reports.
What time of year is best for thermal imaging?
Autumn and winter give the best results, as there is a greater temperature differential between inside and outside the building. Surveys carried out in these months with the heating on produce the clearest and most reliable thermal images.
Will thermal imaging results appear in my survey report?
Yes — when we use thermal imaging during a survey, the relevant thermographic images are included in the written report alongside our interpretation and recommendations. This provides a clear, visual record of any temperature anomalies identified.
Ready to Book a Surrey Surveyor with Thermal Imaging?
Get in touch with our team today for a free, no-obligation quote. We'll advise on the right level of survey for your property and whether thermal imaging is recommended.
Get a Free Quote View Services